Preparing for Metal Siding Installation
Assessing the Project Scope and Requirements
Before diving into the installation process, it's crucial to assess the project scope and requirements thoroughly. This initial step helps ensure a smooth installation process and optimal results for your metal siding panels for shed or any other structure. Begin by measuring the area to be covered, taking into account windows, doors, and other openings. This will help you determine the amount of material needed and identify any potential challenges.
Next, consider the specific requirements of your project. Are there any local building codes or regulations that need to be adhered to? What about climate considerations? Metal siding performs differently in various environments, so it's essential to choose the right type of metal and finish for your location. For instance, in coastal areas, you might opt for aluminum siding due to its corrosion resistance, while steel siding might be more suitable for inland regions.
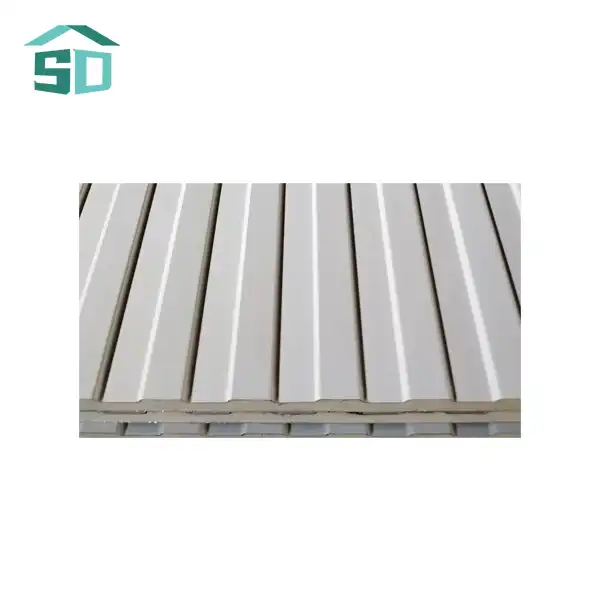
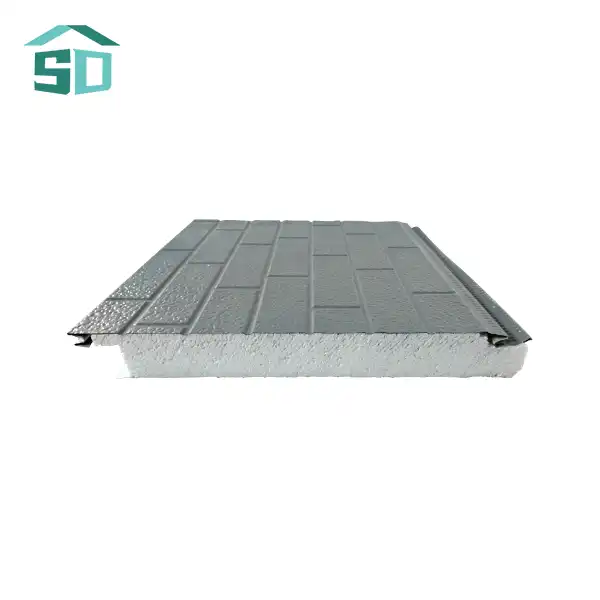
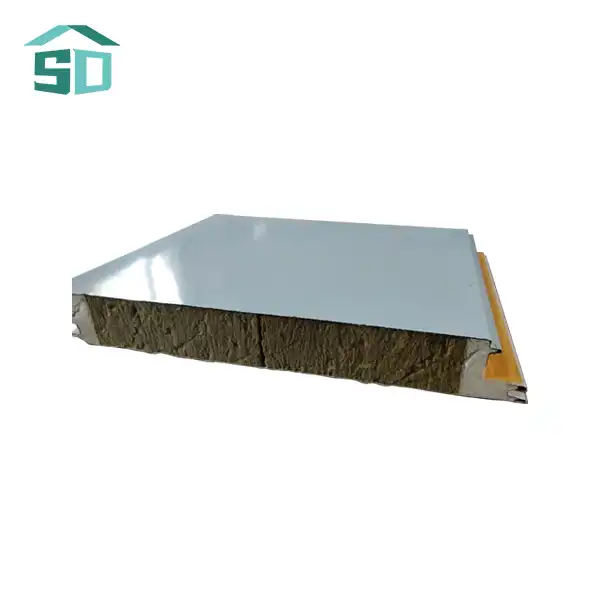
Additionally, think about the aesthetic aspects of your project. Metal siding panels for sheds come in various colors, styles, and profiles. Consider how the chosen siding will complement the overall look of your property. This is also the time to decide on any additional features, such as insulation backing, which can enhance energy efficiency.
Gathering Necessary Tools and Materials
Once you've assessed your project's needs, it's time to gather the necessary tools and materials. Having everything on hand before you start will prevent delays and ensure a more efficient installation process. Here's a list of essential items you'll need:
- Metal siding panels
- Underlayment or weather barrier
-Fasteners (nails or screws specific to metal siding)
- Tin snips or metal shears
- Circular saw with metal-cutting blade
- Tape measure
- Level
- Chalk line
- Hammer
- Utility knife
Safety equipment (gloves, safety glasses, dust mask)
When selecting your metal siding panels for shed, consult with a reputable metal siding panels for shed supplier to ensure you're getting high-quality materials suitable for your specific project. Remember, the quality of your materials can significantly impact the longevity and performance of your siding.
Surface Preparation and Weather Barrier Installation
Proper surface preparation is crucial for a successful metal siding installation. Start by inspecting the existing surface for any damage, rot, or irregularities. Repair any issues and ensure the surface is clean, dry, and smooth. Remove any existing siding, protruding nails, or other obstacles that might interfere with the new installation.
Next, install a weather barrier. This crucial step helps protect the structure from moisture infiltration and improves energy efficiency. Common options include housewrap or building paper. Begin at the bottom of the wall and work your way up, overlapping each course to ensure proper water shedding. Pay special attention to openings like windows and doors, using appropriate flashing techniques to prevent water intrusion.
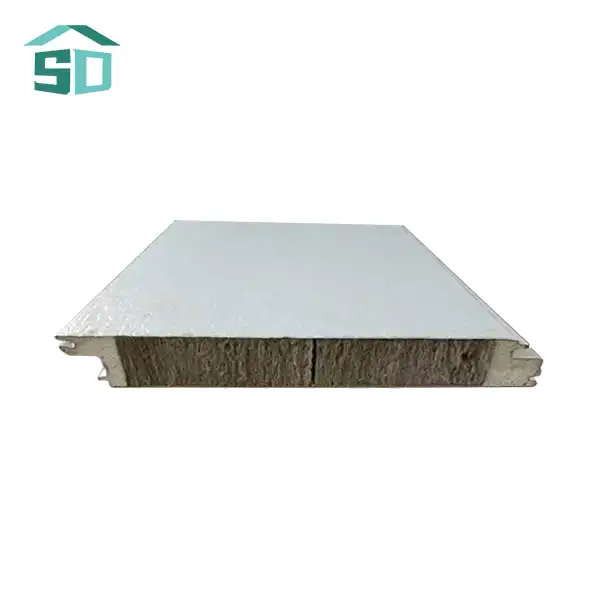
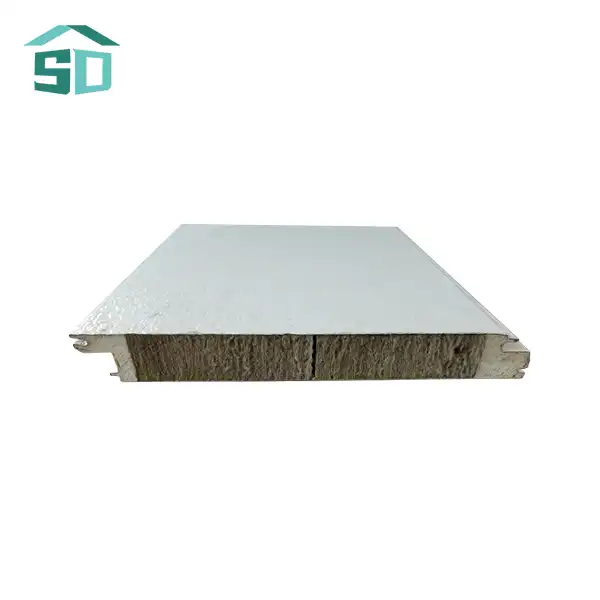
For metal siding panels for shed installations, consider adding a layer of rigid foam insulation between the weather barrier and the siding. This can enhance energy efficiency and provide a more even surface for the siding installation.
Step-by-Step Installation Process
Measuring and Cutting Metal Siding Panels
Accurate measurements and precise cutting are essential for a professional-looking installation. Begin by measuring the length of the wall where you'll be installing the metal siding panels for shed. It's often best to work in sections, especially for larger projects. Use a chalk line to mark where each panel will be placed, ensuring they're level and properly aligned.
When it comes to cutting the panels, use tin snips for small, straight cuts or notches. For longer cuts, a circular saw with a metal-cutting blade is more efficient. Always wear safety glasses and gloves when cutting metal siding. Remember to cut the panels face-down to prevent metal shavings from scratching the surface.
If you're working with insulated metal siding panels, you may need to use a utility knife to trim the insulation backing. Take care not to damage the metal surface when doing this. For complex cuts around windows or doors, create a template using cardboard before cutting the actual panel to ensure accuracy.
Proper Fastening Techniques
Proper fastening is crucial for the longevity and performance of your metal siding installation. The type of fasteners you use will depend on the specific metal siding panels for shed you've chosen and the substrate you're attaching them to. Generally, you'll be using either nails or screws designed specifically for metal siding.
When fastening the panels, start at one end of the wall and work your way across. Place fasteners in the pre-punched slots on the panel, being careful not to overdrive them. The panels should be able to move slightly to allow for expansion and contraction with temperature changes. A good rule of thumb is to leave about 1/32 of an inch between the fastener head and the panel.
Space your fasteners according to the manufacturer's recommendations, typically every 16 to 24 inches along the length of the panel. Be sure to fasten through the structural members of the wall, not just the sheathing. For high-wind areas, you may need to use additional fasteners.
Installing Trim and Flashing
Proper installation of trim and flashing is essential for both the aesthetics and functionality of your metal siding. Start by installing the starter strip at the bottom of the wall. This provides a secure base for the first course of siding and helps ensure it's installed at the correct angle.
Next, install corner posts, J-channel around windows and doors, and any other necessary trim pieces. These should be in place before you begin installing the actual siding panels. When installing J-channel, be sure to leave a small gap (about 1/4 inch) at the bottom to allow for drainage.
Flashing is crucial around windows, doors, and other penetrations to prevent water infiltration. Install flashing before the siding, ensuring it's properly overlapped to direct water away from the structure. For metal siding panels for shed installations, pay special attention to areas where the roof meets the walls, using appropriate flashing techniques to prevent leaks.
As you install the siding panels, you may need to cut and fit them around obstacles. Take your time with these cuts to ensure a clean, professional look. Remember, the trim and flashing not only serve a functional purpose but also contribute significantly to the overall appearance of your metal siding installation.
Maintenance and Care for Metal Siding
Regular Cleaning and Inspection
To maintain the appearance and integrity of your metal siding panels for shed, regular cleaning and inspection are essential. Typically, a gentle wash with a soft-bristled brush and a mixture of warm water and mild detergent is sufficient for routine cleaning. Avoid using abrasive materials or harsh chemicals that could damage the siding's finish.
Perform a visual inspection of your siding at least once a year, preferably in the spring or fall. Look for any signs of damage, such as dents, scratches, or loose panels. Pay special attention to areas around windows, doors, and corners where water might accumulate. Check that all fasteners are secure and that caulking around penetrations is intact.
If you notice any issues during your inspection, address them promptly to prevent more significant problems down the line. Small scratches can often be touched up with paint, while more severe damage may require panel replacement. Consult with your metal siding panels for shed supplier or a professional contractor if you're unsure about how to address any issues you find.
Addressing Common Issues and Repairs
While metal siding is known for its durability, it's not immune to all problems. Here are some common issues you might encounter and how to address them:
- Dents: Small dents can often be popped out from behind using a wooden block and rubber mallet. For larger dents, you may need to replace the affected panel.
- Scratches: Minor scratches can be touched up with paint matched to your siding color. For deeper scratches, you may need to use a metal primer before painting.
- Loose panels: Reattach loose panels using appropriate fasteners. Be careful not to overdrive the fasteners, as this can cause the panel to buckle.
- Leaks: If you notice water infiltration, check the caulking around windows, doors, and other penetrations. Replace any damaged or deteriorated caulk.
- Rust: While less common with modern metal siding, rust can occur if the protective coating is damaged. Clean the affected area, apply a rust converter, and touch up with paint.
Long-term Care and Preservation Strategies
To ensure the longevity of your metal siding panels for shed, implement these long-term care and preservation strategies:
- Maintain proper drainage around your structure to prevent water from pooling near the foundation and potentially damaging the lower portions of your siding.
- Trim trees and shrubs away from your siding to prevent scratches and damage from branches.
- If your metal siding is painted, consider repainting every 10-15 years or as needed to maintain its protective qualities and appearance.
- In areas prone to high winds, periodically check that all panels are securely fastened to prevent wind damage.
- If your region experiences heavy snowfall, use a roof rake to remove snow from overhangs to prevent ice dams that could damage your siding.
- Consider applying a clear protective coating every few years to enhance the siding's resistance to weathering and UV damage.
By following these best practices for installation and maintenance, you can ensure that your metal siding panels for shed will provide long-lasting protection and beauty for your structure. Remember, the key to successful metal siding installation lies in careful planning, precise execution, and ongoing care.
Conclusion
Installing metal siding panels for shed requires careful planning, precise execution, and ongoing maintenance. By following the best practices outlined in this guide, you can ensure a durable, attractive, and long-lasting installation. From proper surface preparation and weather barrier installation to accurate measuring, cutting, and fastening techniques, each step plays a crucial role in the success of your project. Regular cleaning, inspection, and prompt addressing of any issues will help preserve your metal siding's appearance and functionality for years to come. Remember, while DIY installation is possible, consulting with professionals can ensure optimal results, especially for complex projects.
If you're considering metal siding panels for your shed or any other structure, don't hesitate to reach out to us at Weifang Sandong Building Materials Co., Ltd. Our team of experts is ready to assist you with high-quality products and professional advice. Contact us at info@sdqsc.com to learn more about our exterior cladding and facade solutions.
FAQs
How long does metal siding typically last?
With proper installation and maintenance, metal siding can last 40-70 years, depending on the material and environmental conditions.
Can metal siding be installed over existing siding?
While possible, it's generally not recommended. Removing old siding allows for inspection and repair of the underlying structure and ensures a more secure installation.
Is metal siding energy efficient?
Yes, metal siding can be energy efficient, especially when combined with proper insulation. It reflects solar radiation, potentially reducing cooling costs.
How often should metal siding be painted?
High-quality metal siding may not need repainting for 20-30 years. However, repainting every 10-15 years can help maintain its appearance and protective qualities.
References
1. Metal Construction Association. (2021). "Metal Cladding Installation Guide."
2. American Iron and Steel Institute. (2020). "North American Specification for the Design of Cold-Formed Steel Structural Members."
3. National Association of Home Builders. (2022). "Residential Construction Performance Guidelines."
4. International Code Council. (2021). "International Residential Code for One- and Two-Family Dwellings."
5. U.S. Department of Energy. (2022). "Guide to Home Exterior Siding Options."